


A floor plan is a scaled, bird’s-eye diagram showing how rooms, structure, and services connect. Read the scale and legend first, then check orientation and structural walls before you look at anything else. Get those two things wrong and every measurement you take afterward is wrong too.
Here’s the five-item version you can run through in under a minute on any plan someone hands you:
- Scale: find the ratio (1:50, 1:100, or a graphic scale bar) and confirm it matches the print size.
- Orientation: locate the north arrow and figure out which rooms face the sun, the road, or the neighbor’s kitchen.
- Structural walls and columns: identify what’s load-bearing before you dream up an open-concept renovation.
- Service locations: spot the DB (distribution board), water points, and stacks, since these rarely move cheaply.
- Circulation: trace the path from the front door to the bedrooms and check nothing bottlenecks.
For unit-specific verification, cross-check any plan against HDB for public housing, URA for planning matters, or the listing itself on PropertyGuru to confirm you’re looking at the right stack and unit number.
Key Takeaways
Reading a floor plan accurately comes down to checking scale, structural walls, and service locations before judging any room by its drawn proportions alone.
| Point | Details |
|---|---|
| Start with scale and legend | Convert one dimension yourself before trusting how spacious a room looks on paper. |
| Confirm structural status | Verify load-bearing walls with an engineer or the authority before planning any demolition. |
| Locate services early | Find the DB, risers, and stacks, since these are costly or restricted to relocate. |
| Test circulation and furniture fit | Use a virtual walk and a furniture overlay to catch clearance problems before moving day. |
| Verify plan version on site | Check sheet date, unit number, and stack number against the brochure or authority records. |
Table of Contents
- How to Read a Floor Plan in Seven Steps
- Where to Get an Official or Listing Floor Plan
- What Do the Scale and Measurements Actually Mean?
- Walls, Columns, and What You Can’t Move
- How Are Doors and Windows Drawn on a Plan?
- What Do Common Floor Plan Symbols and Abbreviations Mean?
- Can You Tell If a Room Actually Works from the Plan Alone?
- Where Are Utilities and Service Points Shown on a Plan?
- What Do Elevation Notes and ‘Drop’ Values Mean on a Plan?
- A Buyer’s Checklist for Viewings and Renovation Planning
- An Annotated Walkthrough of a Sample Unit Plan
- Load-Bearing Versus Partition Walls: Why the Distinction Changes Your Renovation Budget
- What Are the Regulatory Constraints on Structural Renovation Changes?
- How Are Ceiling Heights Shown on a Floor Plan?
- A Property Consultant’s Take on Common Buyer Mistakes
- Primary Sources and Further Reading
- Frequently Asked Questions
- Sources
How to Read a Floor Plan in Seven Steps
You don’t need an architecture degree to read house plans competently. You need a method, and most people skip straight to “does this room look big enough” without doing the groundwork that makes that judgment reliable.
Step 1: Find the scale and north arrow. Every legitimate plan states its scale near the title block, along with a north arrow. Locating the scale, north arrow, legend, and sheet number first is the standard starting sequence architecture educators recommend, and skipping it is the single most common reason people misjudge room sizes.
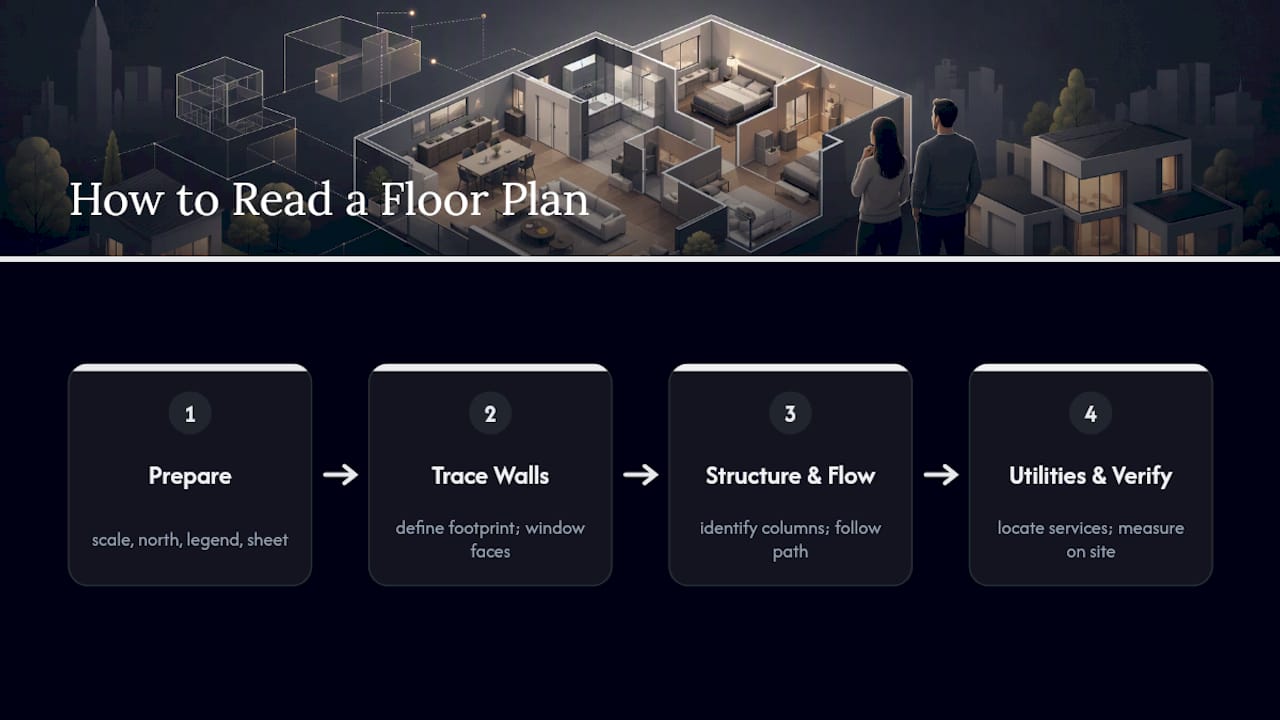
Step 2: Read the legend. The legend translates every symbol, hatch pattern, and abbreviation used on that specific sheet. Legends aren’t universal. A hatch that means “brick wall” on one developer’s plan might mean something else entirely on another.
Step 3: Trace the external walls. This gives you the building’s footprint and tells you which walls face outward, which matters for window placement and privacy.
Step 4: Identify structural elements. Look for thick, filled, or heavily shaded walls and any columns marked with a solid square or circle. These are usually non-negotiable.
Step 5: Follow the circulation path. Walk the plan mentally from the entrance to each room. If you have to cross a bedroom to reach the bathroom, that’s a layout flaw no amount of nice finishes fixes.
Step 6: Locate the utilities. Find the DB box, water points, and any AC ledges. These anchor where kitchens and bathrooms can realistically go.
Step 7: Verify on site with a tape measure. Bring a measuring tape, a PDF scale tool on your phone, or just your phone’s camera to photograph the sheet at an angle you can check later.
Here’s a worked example. Say a wall on the plan measures 64 millimeters with a ruler, and the plan states a scale of 1:50. Multiply 64mm by 50, and you get 3,200mm, or 3.2 meters, in real life. If the plan instead uses an imperial scale of 1/4" = 1’-0", a wall measuring 2 inches on paper represents 8 feet in the finished space. Once you’ve done that conversion once, you’ll eyeball proportions on every future plan far faster.
Where to Get an Official or Listing Floor Plan
Not all floor plans are created equal, and knowing where yours came from tells you how much to trust it.
For HDB flats, the authority itself is the most reliable source for verifying floor layouts tied to your specific block and unit, and it’s also where you’ll eventually apply for renovation approval if you plan structural or service changes. For private condos, developers issue floor plans in the sales brochure, and these are typically the cleanest, most accurate versions available before the unit even exists.
Listing portals like PropertyGuru often republish these developer plans alongside agent-supplied PDFs, but the version quality varies. Some agents scan a brochure page; others provide a clean vector reprint. Interior designers on platforms like Qanvast frequently work from architect or ID drawings that go further than a sales brochure, showing furniture layouts and material call-outs.
Before you rely on any plan, check three things: the sheet date or version number, the unit and stack number printed on the sheet, and whether it matches the sales brochure or the authority’s own records. Developer and listing plans vary in precision, so if you’re planning anything structural, ask for the working or construction drawings rather than the marketing version, since schematic plans often round dimensions or omit service risers entirely.
What Do the Scale and Measurements Actually Mean?
Scale notation looks intimidating until you’ve decoded it once. Metric plans typically use 1:50 or 1:100, meaning one unit on paper equals 50 or 100 of that same unit in reality. Imperial plans use notations like 1/4" = 1’-0", where a quarter inch on the drawing equals one real foot.
A floor plan is fundamentally a scaled two-dimensional diagram viewed from above, and every dimension you see traces back to that scale, whether it’s printed or digital. Graphic scale bars (the little ruler-like icon in the corner) matter more than the written ratio when you’re working from a printed copy, because if someone photocopies or resizes the sheet, the written “1:50” becomes wrong while the graphic bar, which resizes proportionally, stays accurate.
Dimension chains run along the outside of a plan showing room-by-room measurements, and you’ll often see two sets: one measuring to the wall’s structural face, another to the finished interior surface. The gap between them is the wall thickness, and it matters more than people expect. Kitchens and bathrooms usually get separate, larger-scale detail drawings (1:20 or 1:25) because that’s where fixture clearances and plumbing runs need precision a 1:100 overview plan can’t show.
| Scale Notation | Ratio Meaning | Example Conversion |
|---|---|---|
| 1:50 (metric) | 1mm on plan = 50mm real | 64mm on paper = 3.2m actual |
| 1:100 (metric) | 1mm on plan = 100mm real | 64mm on paper = 3.2m actual |
| 1/4" = 1’-0" (imperial) | 1/4 inch = 1 foot real | 2 inches on paper = 8 feet actual |
| 1:20 or 1:25 (detail) | Used for kitchens/baths | Shows fixture-level precision |
If you’re working from a PDF, most viewers include a measuring or scale tool under the annotation menu, letting you click two points and get a real-world distance once you’ve told it the plan’s stated scale.
Walls, Columns, and What You Can’t Move
Structural elements are drawn differently from partition walls, and learning to tell them apart before you fall in love with an “open concept” renovation idea will save you a very expensive surprise.
On most plans, structural walls appear thick, solid, and often filled in black or dark hatching. Non-structural partition walls are drawn thinner, sometimes with a lighter hatch or no fill at all. Columns show up as solid squares or circles, usually clustered near the building’s perimeter or at regular intervals through the middle of larger units. Beams, when shown, appear as dashed rectangles overlaid on the ceiling plan or noted separately. Renovation plans sometimes distinguish existing walls from proposed new ones using different line weights, so check the legend for a note like “existing” versus “new” or “demolished.”
Pro Tip: Never take a symbol’s appearance as final confirmation of structural status. Always verify with the building’s authority or a structural engineer before any demolition, even if the wall “looks” like a partition. URA circulars on permitted building changes exist precisely because plans can be misread, and the cost of guessing wrong is a lot higher than the cost of a professional site visit.
How Are Doors and Windows Drawn on a Plan?
Doors appear as a line break in the wall with a quarter-circle arc showing the swing direction and clearance the door needs when fully open. A door swinging into a hallway can eat up space you were counting on for a console table or shoe rack.
Sliding doors are drawn as a straight line with an arrow or a double-line rail symbol, and pocket doors show as a line disappearing into the wall cavity, since they slide inside the wall itself rather than swinging. Windows appear as a break in the exterior wall line, often with a thinner double line indicating the glass pane, and casement windows may include a small arrow showing which way they swing open.
At a viewing, verify these on-site items against the drawing:
- Clear door width (the usable opening, not the frame-to-frame measurement).
- Window sill height, especially in bedrooms if you’re planning cot rails or furniture below.
- Swing clearance for every door, checked against where you plan to place furniture.
- Whether any window opens directly into a neighboring unit’s line of sight.
What Do Common Floor Plan Symbols and Abbreviations Mean?
Every plan comes with a legend, but the abbreviations inside it follow patterns you’ll see repeated across most residential drawings. Building this vocabulary once means you stop rereading the same legend three times per viewing.
- DB: distribution board, the electrical panel controlling circuits for the unit.
- AFF: above finished floor, used to specify heights for outlets, switches, and fixtures.
- R.O.: rough opening, the unfinished gap a door or window frame sits inside.
- NIC: not in contract, meaning that item is shown for reference but isn’t included in the current scope.
- TYP: typical, meaning a dimension or detail repeats elsewhere without being individually labeled.
- W.I.C.: walk-in closet.
- O.C.: on center, a spacing measurement used mostly for structural framing.
Common plan abbreviations like these appear across most residential drawings, and once you recognize a dozen or so, a legend stops feeling like a foreign language. Local shorthand does vary, though. Developer plans and HDB documents sometimes use terms specific to that project or authority, so if a symbol in the legend doesn’t match anything you recognize, ask the agent or the sales office directly rather than guessing.
Can You Tell If a Room Actually Works from the Plan Alone?
You can test a room’s real-world usability directly on the drawing using a technique sometimes called the “virtual walk.” Stand yourself, mentally, in the center of a drawn room and look in four directions, checking sightlines, door swings, and whether furniture placement leaves a usable path through the space. This method reveals conflicts a simple square-footage number never will, like a bedroom door that swings directly into where a queen bed’s footboard would sit.
Run through some baseline clearances while you’re at it. A bed generally needs about 60 to 70 centimeters of clearance on at least one side for you to walk past comfortably. A sofa facing a TV needs roughly 90 centimeters of legroom to a coffee table. Kitchen aisles, especially in a galley layout, need a minimum of about 90 centimeters between opposing counters so two people can pass without turning sideways.
Pro Tip: Sketch a rough furniture overlay directly on a printed or digital copy of the plan before you commit to a unit. Experienced buyers use this exact furniture overlay method to catch hidden conflicts, like a door that blocks a light switch or a hallway too narrow for a moving truck’s dolly. Sketching your actual bed frame, sofa, and dining table to scale takes fifteen minutes and often exposes problems a walkthrough alone won’t, particularly in smaller condo layouts where every fifty centimeters counts.
Where Are Utilities and Service Points Shown on a Plan?
Service locations get their own set of symbols, and they matter more to your renovation budget than almost anything else on the sheet.
- DB (distribution board): usually near the entrance or a storeroom, marked with a small labeled box symbol.
- Gas riser: a vertical shaft symbol, typically near the kitchen, shared across multiple floors in a building.
- Water riser or stack: another shared vertical shaft, usually near bathrooms, marked distinctly from the gas riser.
- AC ledge: a marked outdoor recess or platform, usually along an external wall, where condenser units sit.
- Drain stacks: vertical pipe runs, often bundled with the water riser, carrying wastewater down through the building.
Risers and stacks are shared infrastructure running through every floor of the building, which is exactly why they’re expensive or outright forbidden to relocate. Moving a kitchen sink two meters away from its riser means running new drainage at a slope steep enough to work, and that’s before you touch any structural slab. Some of these moves need specialist consent from the building’s management or the authority, not just your contractor’s blessing.
Before signing off on any renovation plan, confirm there’s no maintenance access zone around a riser or stack that legally has to stay clear. Developers and building management often restrict what you can build over or against these zones, even inside your own unit’s boundary.
What Do Elevation Notes and ‘Drop’ Values Mean on a Plan?
Elevation callouts and “drop” notations tell you where floor levels change, and they’re easy to miss if you’re only scanning for room dimensions.
A “drop” of 50mm, for example, means the finished floor level in that zone sits 50 millimeters lower than the reference level elsewhere in the unit. Bathrooms commonly have a drop to accommodate waterproofing membranes and to direct water toward a floor trap. That small level change affects threshold design, and if accessibility matters to your household, a 50mm drop without a ramped transition can be a real obstacle for a wheelchair or a stroller.
Ceiling heights typically show up on a separate document called a reflected ceiling plan (RCP), or occasionally as a note directly on the floor plan itself, like “ceiling height 2.6m” near a specific room. If a unit’s brochure or listing doesn’t mention ceiling height at all, ask for the RCP or the building’s technical specification sheet before assuming a standard height, since false ceilings for aircon ducting or recessed lighting can quietly eat 15 to 20 centimeters off a room’s usable height.
| Notation | What It Means | Practical Implication |
|---|---|---|
| Drop 50mm | Floor sits 50mm lower in that zone | Common in bathrooms for waterproofing and drainage slope |
| FFL (finished floor level) | Reference height for that floor’s finish | Used to compare levels across rooms |
| RCP | Reflected ceiling plan | Shows true ceiling height, ducting, and lighting layout |
| Ceiling height note | Stated directly on plan or spec sheet | Verify against brochure if false ceiling is planned |
A Buyer’s Checklist for Viewings and Renovation Planning
Tie every item you check in person directly back to something you already spotted on the plan. This is where reading the drawing beforehand actually pays off, because you walk into the viewing already knowing what to look for.
- Confirm structural walls and columns match what the plan shows, especially near any wall you’d want to remove.
- Locate the DB, water risers, and gas riser in person and compare their position to the drawing.
- Check window orientation against the compass direction stated, since afternoon sun on a west-facing bedroom is a different experience than morning light.
- Test storage space against your actual belongings, not just the labeled “W.I.C.” on the plan.
- Walk the full circulation path from the front door to every bedroom and bathroom.
When you meet the developer, agent, or interior designer, ask these directly: Which plan version am I looking at, and does it match current as-built conditions? Where exactly do the water and gas risers run? What’s the snagging and defect reporting process after handover? Do I need approval for the changes I’m planning, and from whom? Is there a maintenance access zone I need to keep clear? What’s the ceiling height in the kitchen and bathroom specifically, given false ceiling plans?
For high-value properties, or anywhere a hidden defect could be expensive to fix after the fact, professionals recommend hiring a dedicated inspector rather than relying on a visual walkthrough alone, particularly once the unit’s value crosses roughly S$1.5 million. If you’re heading into a new launch purchase, our new launch property checklist walks through the additional documentation you’ll want on hand before committing.
An Annotated Walkthrough of a Sample Unit Plan
Picture a typical three-bedroom condo unit, roughly 90 square meters, with the entrance facing north. Here’s how the seven-step method applies to a real sheet, with callouts numbered as you’d expect on an annotated image.
(Annotated floor plan placeholder: numbered callouts showing 1. north arrow and scale bar, top left; 2. DB location, in the entrance storeroom; 3. structural wall, thick hatch along the shared party wall; 4. window corridor, aligned living room and master bedroom windows; 5. furniture overlay, sofa and dining table sketched to scale.)
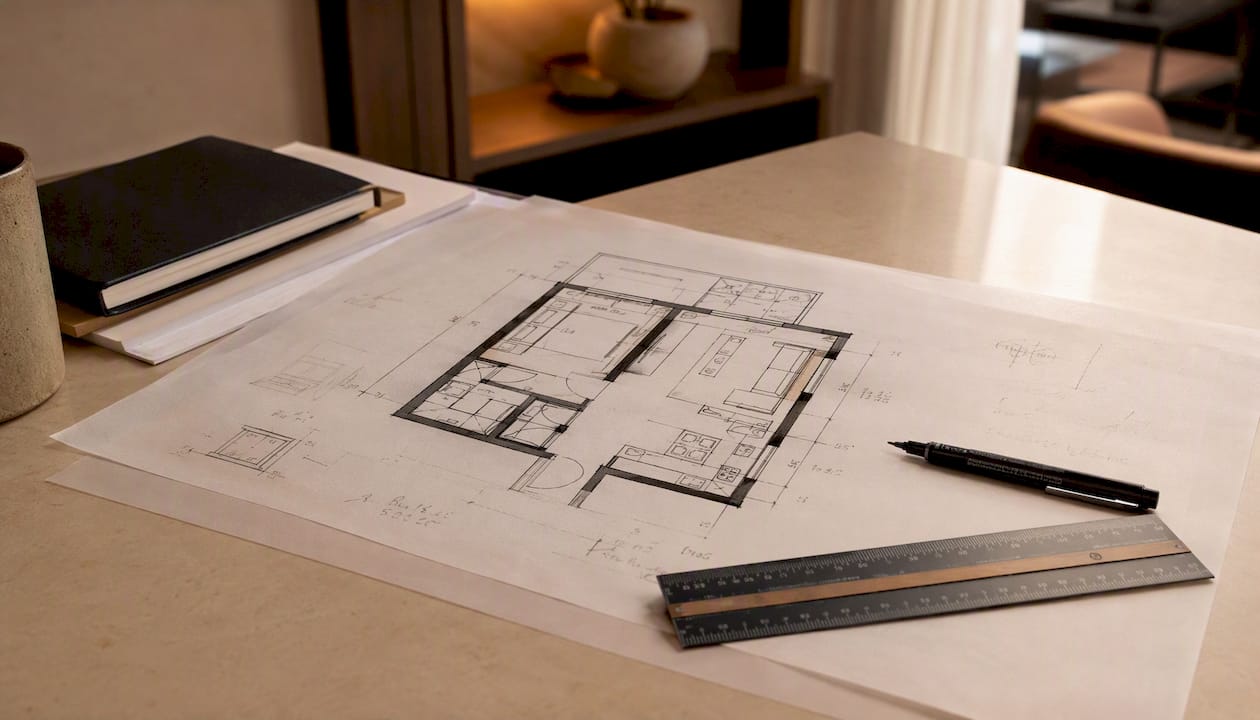
Callout 1, scale and orientation: The scale reads 1:75, and the north arrow shows the living room facing northeast, meaning morning sun without full afternoon heat buildup.
Callout 2, service location: The DB sits in the entrance storeroom, a common placement that keeps wiring runs short but means any smart home panel upgrade has to happen in that same footprint.
Callout 3, structural wall: The thick hatched wall between the master bedroom and the shared corridor is structural, ruling out combining the master bedroom with the adjacent study for a larger suite.
Callout 4, view corridor: The living room and master bedroom windows align on the same facade, a design choice that maximizes cross ventilation and light, a detail worth actively looking for rather than assuming.
Callout 5, furniture overlay: Sketching a queen bed into the second bedroom reveals only 45 centimeters of clearance on one side, tighter than the 60 centimeters you’d want for comfortable daily movement.
Three renovation constraints jump out from this walkthrough: the structural party wall rules out merging rooms, the water riser near the kitchen limits how far a sink can move, and the entrance DB placement constrains where new circuits can originate. For layout inspiration on how other three-bedroom units solve similar constraints, browsing comparable floor plan configurations can shortcut a lot of guesswork.
Pro Tip: A property consultant’s first move at handover is almost always the same: document everything before you touch anything. Photograph every wall, corner, and fixture with a timestamp, and get any promised rectification work in writing with a deadline attached, since verbal assurances at handover rarely survive the following month.
Load-Bearing Versus Partition Walls: Why the Distinction Changes Your Renovation Budget
The difference between a load-bearing wall and a partition wall isn’t cosmetic. It’s the difference between a renovation that costs a few thousand dollars and one that requires engineering drawings, temporary shoring, and authority sign-off.
Load-bearing walls carry structural weight from the floors above down through the foundation. Removing one without proper reinforcement risks sagging floors, cracked finishes, or worse. Partition walls, by contrast, only divide space. They can usually come down with a permit and some dust, nothing more dramatic. The trouble is that both types can look similar on a casual glance at a plan, which is exactly why the earlier point about verifying with an engineer before demolition isn’t just caution for caution’s sake.
In practice, most party walls (the ones shared between your unit and your neighbor’s) are structural by necessity, and so are walls running along a building’s core or lift shaft. Interior walls dividing a living room from a study are far more likely to be partitions, but “likely” isn’t “confirmed,” and confirmation is the whole point of checking before you renovate.
What Are the Regulatory Constraints on Structural Renovation Changes?
Every jurisdiction sets limits on what you can legally change in a residential unit, and Singapore’s are enforced through a combination of building authority approval and, for HDB flats, direct application to the housing board itself.
For HDB units, any renovation involving hacking of structural walls, changes to the unit’s layout beyond minor works, or alterations to common services requires formal approval before work begins. Skipping this step isn’t just risky, it can mean being ordered to reinstate the original layout at your own cost. For private condos, the management corporation typically requires similar sign-off, and any change that touches the building’s core structure, facade, or shared services may also fall under URA’s planning circulars governing what’s permitted without a fresh planning submission.
Common permitted changes across most residential types include non-structural partition removal, kitchen and bathroom fixture relocation within existing plumbing zones, and flooring or ceiling finish changes. Common restrictions include altering party walls, changing a unit’s external facade or window openings, and any modification to shared risers, stacks, or structural columns without engineering certification.
How Are Ceiling Heights Shown on a Floor Plan?
Standard floor plans, the ones showing walls and room layouts from above, rarely state ceiling height directly, because that’s a vertical measurement and the plan is a horizontal slice. This is also why doors and windows on a plan look like simple gaps in a wall line: the drawing is essentially a cut taken through the building at roughly four feet above the floor, so nothing above or below that slice appears unless it’s specifically annotated.
When ceiling height is stated, it usually appears as a note near the room label, something like “ceiling height 2.6m,” or it’s documented separately in the reflected ceiling plan. If you’re relying on a sales brochure and it’s silent on ceiling height, that’s a gap worth asking about directly, particularly in units with false ceilings for ducted air conditioning, since actual headroom can end up noticeably lower than the slab-to-slab height advertised.
A Property Consultant’s Take on Common Buyer Mistakes
The mistake I see most often is buyers falling for a floor plan’s proportions without checking the scale that produced them. A living room drawn slightly larger relative to the bedrooms on one brochure page can look genuinely spacious, and then feel cramped in person because the scale used made everything appear a touch more generous than reality. The fix is simple and takes two minutes: always find the stated scale, do one conversion yourself, and compare that real number against a room you already know, like your current bedroom.
The second habit worth building is treating the legend as mandatory reading, not an afterthought. Buyers skip it constantly, then get surprised at handover by a service riser sitting exactly where they’d planned an island counter.
(Downloadable checklist placeholder: one-page PDF summarizing the seven-step method and viewing checklist, available for download.)
If your renovation plans involve anything structural, or if you’re weighing a unit where the layout raises real questions, working with a property consultant before you commit tends to save far more than it costs, particularly on units where the plan alone doesn’t answer every question you have.
Primary Sources and Further Reading
For official verification of HDB unit layouts and renovation approval requirements, start directly with HDB. For planning circulars and building control matters affecting what changes are permitted, URA’s technical guidelines are the authoritative source.
For practical how-to reading, Houzz Singapore’s guide and Ataman Studio’s beginner walkthrough both cover symbol conventions in more depth than a single article can. Home & Decor Singapore explains the horizontal-slice convention behind why plans look the way they do.
For finding listing plans and layout inspiration, PropertyGuru remains the largest source of unit-specific plans, while Qanvast connects buyers to interior designers who work from architect drawings. RoomSketcher is a useful tool if you want to sketch your own furniture overlay digitally rather than by hand.
Frequently Asked Questions
What’s the fastest way to learn how to read a floor plan?
Start with the scale, north arrow, and legend, then do one real measurement conversion yourself. Once you’ve converted a single dimension from paper to real-world size, every other measurement on that sheet becomes easier to judge accurately.
How do I know if a wall is load-bearing just from the plan?
Thick, filled, or heavily hatched walls usually indicate structural elements, especially party walls and anything near a building’s core. Treat the symbol as a strong hint, not final confirmation, and verify with the authority or a structural engineer before any demolition.
Why don’t floor plans show ceiling height?
A standard floor plan is a horizontal slice taken about four feet above the floor, so it shows walls, doors, and windows but nothing about vertical height. Ceiling height appears separately, either as a note on the plan or in a dedicated reflected ceiling plan.
Where can I get an accurate floor plan for a resale flat or condo?
For HDB flats, HDB’s own records are the most reliable source. For private condos, ask your agent for the developer’s original brochure plan or, for structural questions, the building’s as-built drawings rather than the marketing version.
What should I bring to a viewing to verify a floor plan?
Bring a measuring tape, your phone for photos, and a printed or digital copy of the plan with your own scale conversions already marked. Comparing real measurements against the drawing on the spot catches discrepancies before you’ve committed to anything.
Sources
- Learn how to read a floor plan — Houzz Singapore
- How to Read a Floor Plan — Ataman Studio
- Floorplans 101 — Home & Decor (Singapore)
- URA circulars / guidelines
- Essential condo defect inspection tips — A1 Inspection
Recommended
- From Showflat to Key Collection: The Ultimate 2025 First-Timer’s Guide to Buying a New Launch Condo in Singapore | Aesthetic Havens
- PSF in Property: What Investors and Tenants Need to Know
- Pinetree Hill Review (2025): Price Analysis, Floor Plans, and Future Growth in District 21 | Aesthetic Havens
- avenuehome.sg Alternatives for Singapore Buyers: 2026


